I have been searching for a bike since I finished grad school and moved back to VA. I left my hand-me-down bike in California, PA, so when I moved down to the Lynchburg area for my new job, I HAD to have a bike ASAP. As I've still been searching for the perfect bike at the lowest price and best deal.... a year and half later... I've still been looking.
My search started at the local bike shop. In the Fall of 2011, I even made a list of my "dream bike," but by the spring I had come to my senses and deleted the list. I knew I had to keep my bike ownership expectations to the reality of craigslist. I was not going to be picky about color. I was not going to dream about disc brakes. I was not going to even care about year or specific model.
Here was my craigslist criteria: Less than $350, women's size, mountain or hybrid style, no flat tires, no bent wheels, no worn down chains or gears, and overall it had to be a well kept bike. This is actually still demanding list... hints why over a year later I was still looking for a bike.
In the process of scouting out craigslist ads (of all major VA areas and other cities where I have friends living), I realized that if I got a bike, I would also want Ryan to have a bike so someone would ride around with me.
A weekend earlier in December, I took Ryan to test ride an orange 2009 trek mountain bike I found on craigslist. The bike owner was really nice; he wanted someone to have his bike and enjoy it as much as he had. He told us about trails in the area should try, etc, etc. However, when Ryan test rode it on a college campus with lots of hills... the chain popped off. Ugh.
We decided to stop by the local bike shop (the same one that I originally went by when I first moved back to VA) to see the costs of fixing said craigslist bike. Low and behold, we found an awesome, green, XL 2012 Trek mountain bike 3700 with disc brakes... on sale for $150 off. It didn't take much convincing to scratch the craigslist idea all together. Merry Christmas and Happy Birthday to Ryan, from me!
Through the local bike shop, I ordered a green, 2012, medium sized, Trek mountain bike 3500 with disc brakes, at a negotiated sale price! Exactly what I wanted. Happy Birthday to me! Today, I brought home my green Trek gem and rode it up and down my street with Wrigley chasing me. I can't wait to go biking around with Ryan, lots of possibilities lie ahead!
Sunday, December 30, 2012
Thursday, December 20, 2012
Christmas decorations
As we get ready to head out to see family tomorrow, I thought it'd be nice to put up pictures of our Christmas decorations. We didn't do a big tree... although I look forward to being mesmerized by my grandparents trees in Alabama. One of my grandparents does an angel tree with white lights and ALL angel ornaments (except for a few with pictures of grandchildren, but they don't distract from the angels). My other grandparents have a tree with ornaments that remind me of things that represent my family... Auburn, music, trains, baby pictures, ornaments from travels, etc. Both trees are the focal point of the living rooms during Christmas, even after the presents are opened.
The other reason I love Christmas decorations is because it's a traditions to drive around the old Decatur streets and neighborhoods to spot the houses that participate in the decorating contests. It's a competition. And we all know I love competition. They have awards for lighting, traditional, winter wonderland, and other categories. As you drive around, there are signs out front for the 1st, 2nd, 3rd place and honorable mention winners.
These houses are decked out.... wreaths in every window, weighed down with pineapples, oranges, red and green apples, bows, lights, and ornaments. There is garland, everywhere. There is always a giant nutcracker, that stands in a front doorway. There are lots of reindeer, sleighs and Santas. One wreath features a pair of ice skates. There is a Charlie Brown Christmas house. I guess I'm giving too much away.... I will definitely be posting a week's worth of pictures this year for all to see! It. is. the. best.
Enough about the AWESOME decorations I'll see in Alabama... here are some pics of my apartment decorations....
There are also white lights outside, wrapped around the stairs leading up to the porch, however it's hard to take good pictures of lighting.
The holiday season is a special time of year when we all get to spend time with family and friends and celebrate the birth of Christ Jesus! MERRY CHRISTMAS !!
The other reason I love Christmas decorations is because it's a traditions to drive around the old Decatur streets and neighborhoods to spot the houses that participate in the decorating contests. It's a competition. And we all know I love competition. They have awards for lighting, traditional, winter wonderland, and other categories. As you drive around, there are signs out front for the 1st, 2nd, 3rd place and honorable mention winners.
These houses are decked out.... wreaths in every window, weighed down with pineapples, oranges, red and green apples, bows, lights, and ornaments. There is garland, everywhere. There is always a giant nutcracker, that stands in a front doorway. There are lots of reindeer, sleighs and Santas. One wreath features a pair of ice skates. There is a Charlie Brown Christmas house. I guess I'm giving too much away.... I will definitely be posting a week's worth of pictures this year for all to see! It. is. the. best.
Enough about the AWESOME decorations I'll see in Alabama... here are some pics of my apartment decorations....
 |
| Reindeer sitting in my kitchen window |
 |
| A "mantel" with stockings... hanging above the couch. |
 |
| The teapot I got for my birthday and some winter salt & pepper shakers. |
 |
| And the star topper |
 |
| A mini tree with Chicago Bears ornaments. |
There are also white lights outside, wrapped around the stairs leading up to the porch, however it's hard to take good pictures of lighting.
The holiday season is a special time of year when we all get to spend time with family and friends and celebrate the birth of Christ Jesus! MERRY CHRISTMAS !!
Monday, December 17, 2012


holiday bark
I have always loved different bark desserts, so this year for my work holiday potluck I decided to make peppermint bark and caramel, pretzel chocolate bark! Trying these two recipes required me to master two new techniques in the kitchen.... caramelizing brown sugar and using a double boiler.
End result: I'm still not sure how long to wait for brown sugar to caramelize and I LOVE using a double boiler (or maybe I loved it because chocolate was involved -- melted, gooey, creamy, beautiful chocolate). Additional kitchen education included (a) white chocolate stiffens if it's heated too fast and (b) caramelized brown sugar tastes like toffee. I will definitely do these desserts again, so you could even try them!
CARAMEL PRETZEL CHOCOLATE BARK:
2 sticks unsalted butter
1 c. light brown sugar
few handfuls of mini pretzels
about 14 oz semi-sweet chocolate chips
Preheat oven to 400. Melt butter over medium heat. Cover a pan with foil, arrange pretzels to layer the pan. Mix in brown sugar to melted butter. Let it bubble/simmer, stir occasionally, do not allow to boil, wait for it to caramelize. Pour over tray of pretzels, use a spatula to spread it out, however it will spread out a little in the oven. Cook for 5-7 minutes. Allow it to mostly cool (I put it in the freezer for about 5-8 minutes). While the tray is cooling, melt chocolate chips over a double boilers (which is EASY and awesome.). Spread the melted chocolate over the top. Allow the tray to completely cool either in the fridge or freezer. Peel the foil off the back and break into pieces.


2. Be more careful when pulling the tray out of the oven so the pretzel's don't overlap.
3. It's not necessary to cover the whole tray with chocolate... the caramelized brown sugar is hard enough.
4. Try sprinkling sea salt on top after the chocolate is spread.
5. Try adding sliced almonds to the bark. Add to the tray with the layer of pretzels before pouring caramelized brown sugar. Also sprinkle some on the top after the chocolate.
PEPPERMINT BARK:
18 oz white chocolate chips
20 oz dark chocolate chips
12 peppermint candy canes
 Cover tray with foil. Smash the candy canes into dust and small pieces. Melt dark chocolate chips over a double boiler. Pour onto tray with foil. Allow to mostly cool (I put it in the freezer for a few minutes). While the tray is cooling, melt the white chocolate chips over a double boiler. Be careful not to heat the white chocolate too much. Poor white chocolate onto tray. For the marble affect, use a knife to cut though the top layer, or spread white chocolate around a little. Sprinkle peppermint on chocolate. Cool in freezer completely. Peel foil and break bark into pieces.


Improvements for next time:
1. Smash less candy canes, I had a lot of left over peppermint and wish I had candy canes left, not dust.
2. Don't allow water to boil under white chocolate. I only marbled my bark because the white chocolate started to stiffen up since I heated it too much.
If I had to choose one of these to make again, I would make the caramel pretzel chocolate bark. I'm a real fan of the toffee type texture and flavor, so that one was my favorite. The peppermint bark has a really thick chocolate base and it is festive with the peppermint topping. If you try one of these, make sure to read the suggested improvements, definitely things I hope to remember for next time!
End result: I'm still not sure how long to wait for brown sugar to caramelize and I LOVE using a double boiler (or maybe I loved it because chocolate was involved -- melted, gooey, creamy, beautiful chocolate). Additional kitchen education included (a) white chocolate stiffens if it's heated too fast and (b) caramelized brown sugar tastes like toffee. I will definitely do these desserts again, so you could even try them!
 |
| Preview of the peppermint bark |
 |
| What you need |
2 sticks unsalted butter
1 c. light brown sugar
few handfuls of mini pretzels
about 14 oz semi-sweet chocolate chips
Preheat oven to 400. Melt butter over medium heat. Cover a pan with foil, arrange pretzels to layer the pan. Mix in brown sugar to melted butter. Let it bubble/simmer, stir occasionally, do not allow to boil, wait for it to caramelize. Pour over tray of pretzels, use a spatula to spread it out, however it will spread out a little in the oven. Cook for 5-7 minutes. Allow it to mostly cool (I put it in the freezer for about 5-8 minutes). While the tray is cooling, melt chocolate chips over a double boilers (which is EASY and awesome.). Spread the melted chocolate over the top. Allow the tray to completely cool either in the fridge or freezer. Peel the foil off the back and break into pieces.


 |
| Caramelizing |
 |
| The caramelized brown sugar will spread out more when cooked for 5-7 min |
Improvements for next time:
1. Increase the brown sugar/butter amount by 1/2, so it will cover the tray better.2. Be more careful when pulling the tray out of the oven so the pretzel's don't overlap.
3. It's not necessary to cover the whole tray with chocolate... the caramelized brown sugar is hard enough.
4. Try sprinkling sea salt on top after the chocolate is spread.
5. Try adding sliced almonds to the bark. Add to the tray with the layer of pretzels before pouring caramelized brown sugar. Also sprinkle some on the top after the chocolate.
PEPPERMINT BARK:
18 oz white chocolate chips
20 oz dark chocolate chips
12 peppermint candy canes


Improvements for next time:
1. Smash less candy canes, I had a lot of left over peppermint and wish I had candy canes left, not dust.
2. Don't allow water to boil under white chocolate. I only marbled my bark because the white chocolate started to stiffen up since I heated it too much.
If I had to choose one of these to make again, I would make the caramel pretzel chocolate bark. I'm a real fan of the toffee type texture and flavor, so that one was my favorite. The peppermint bark has a really thick chocolate base and it is festive with the peppermint topping. If you try one of these, make sure to read the suggested improvements, definitely things I hope to remember for next time!
Thursday, December 13, 2012
thursday thanks
not being a student during finals week
wrigley being hypoallergenic
negative strep tests
homemade Christmas presents
the smell of craft stores
the smell of Christmas
mountain bikes
knowledgeable bike store owners
early Christmas presents
first spinning session
finding out blanching cauliflower is easy
holiday parties with friends and coworkers
Christmas music
missing soccer
my smart sister
swimming
planning Christmas in alabama
Wednesday, December 12, 2012
trying cauliflower salad
I tried this new dish this weekend. It was easy, healthy and had a short list of ingredients. I probably won't cook it again because I didn't really like it.
This dish included roasting red peppers. Last time I roasted red potatoes, I had a really hard time peeling them. This time I cut them into big pieces, covered them with a little olive oil (I'm not sure why I thought this was a good idea, but it worked so I'll do it next time...even if it doesn't do anything!), and broiled them skin side up until the skin was charred black and really bubbly. I let them cool for about 10 minutes and then EASILY peeled them. Success!

I was also supposed to blanch the cauliflower. I don't know what blanch means or if I like blanched cauliflower, so instead I steamed them. Maybe I would have liked the salad better if they were blanched...
Anyways, here's what I did. Suggestions welcome!
Cauliflower salad

Ingredients:
2 heads of cauliflower (1 white, 1 green), chopped
2 roasted red peppers
1/2 cup sliced black olives
Dressing:
1 tbsp lemon juice
1 1/2 tbsp olive oil
3 cloves of garlic, minced
1 tbsp fresh parsley, chopped
2 tsp Worcestershire sauce
salt and pepper
Mix dressing ingredients. Steam cauliflower in for 10-15 minutes. Roast red peppers for 10-15 minutes in big pieces, until charred black and really bubbly. Let peppers cool for 10 minutes, peel off skin and cut into small pieces. Stir in dressing to cauliflower, roasted peppers and black olives. Set in fridge to cool and allow flavors to blend before serving.

Improvements for next time:
1. Learn to blanch instead of steam cauliflower.
2. Chop cauliflower into smaller pieces.
3. Refrigerate longer before serving.
4. Maybe try a different dressing to see if I like that better.
This dish included roasting red peppers. Last time I roasted red potatoes, I had a really hard time peeling them. This time I cut them into big pieces, covered them with a little olive oil (I'm not sure why I thought this was a good idea, but it worked so I'll do it next time...even if it doesn't do anything!), and broiled them skin side up until the skin was charred black and really bubbly. I let them cool for about 10 minutes and then EASILY peeled them. Success!

I was also supposed to blanch the cauliflower. I don't know what blanch means or if I like blanched cauliflower, so instead I steamed them. Maybe I would have liked the salad better if they were blanched...
Anyways, here's what I did. Suggestions welcome!
Cauliflower salad

Ingredients:
2 heads of cauliflower (1 white, 1 green), chopped
2 roasted red peppers
1/2 cup sliced black olives
Dressing:
1 tbsp lemon juice
1 1/2 tbsp olive oil
3 cloves of garlic, minced
1 tbsp fresh parsley, chopped
2 tsp Worcestershire sauce
salt and pepper

Improvements for next time:
1. Learn to blanch instead of steam cauliflower.
2. Chop cauliflower into smaller pieces.
3. Refrigerate longer before serving.
4. Maybe try a different dressing to see if I like that better.
Tuesday, December 11, 2012
weekend wrap up
This past weekend was a lot of fun!
Friday night, Ryan and I went to a holiday party at Ryan's work! We planned ahead for Wrigley and Fenway to have a playdate during the holiday party since they have so much fun together! Fenway's parents, Alexis and Bryan, work with Ryan, and are friends of ours. I went down to Lynchburg early to get ready with Alexis, and watch Wrigley and Fenway run up and down 3 flights of stairs. We went to the party with several of Ryan's other co-workers and coaches. It was so much fun to dress up and hang out with some people we don't get to see a lot.


Saturday, Wrigley slept ALL day. She could barely hold her eyes open for more than a few minutes at a time. She didn't recover until sometime Sunday evening. Is this what I was like after sleepovers in elementary school?
Sunday, after early church (with lots of Christmas music!), we met Bryan and Alexis at the J.Crew warehouse sale. Imagine a fairly large warehouse, FULL of boxes. When you entered, you were handed you a large, clear trash bag, plus a list of prices for items. For example: Women's solid tees ...$5. Women's pattern tees... $8. Headbands ...$2. Swimsuits (per piece) ...$5. Tall Boots ...$100. The sale area had rows and rows of boxes sitting on tables, with another row of boxes underneath. Piles of shirts, pants, dresses, swimsuits, kids shirts, sweaters, shorts, cardigans, etc. No real organization at all. I thought the boxes would at least be labeled. (I wish I had a picture).
Going to college in Lynchburg, I've heard about these sales, but never been. The stories include women dressed in all spandex (to be able to try clothes on, since there are no fitting rooms), waiting in line before 7am and literally fighting to go through boxes before anyone else. To me, it sounded like a great deal of pain in order to come out with the great deal on clothes. This weekend, I'm glad that we went at 11, missing the crowds. There was also a sale a few weeks ago, so I'm sure the boxes had already been picked through. I got a few items, but next time I'll be better prepared (including eating before entering so I'm not hungry).
After J.Crew and lunch, Ryan and I drove to an antique store, window shopped for bikes and got groceries. By dinner, Wrigley started waking up from her coma and wanting to play tug-of-war with all her toys. And just like that, the weekend turned into the beginning of another week.
Wednesday, December 5, 2012
cheesy veggie and broccoli soup
Another "I need help with the simplest recipe." My struggle cooking dinner today included not being able to figure out "simmering until slightly thickened". What does slightly thickened mean? STRUGGGGGGLE.
I LOVE love love love cheese and broccoli soup. My Grandpa Fred always makes it for me when I visit them in Alabama (which will happen in a few weeks! Eeeeeee!).
I thought this dish would be similar to Grandpa Fred's, yet different enough that I wouldn't compare it to his soup exactly. Maybe it was sort of different enough, but when I was struggling with the "slightly thickening" I thought, how does Grandpa DO this...? After tripling the amount of flour in the recipe and adding a splash of heavy cream (which is what thickened the sauce in my basil pasta dish), I got the cheese sauce thicker... somehow. (However I thought the sauce was a little grainy, not a smooth, creamy texture... was that because of the extra flour? or because of the over cooked potatoes?).
The recipe I found on pinterest:
http://luluthebaker.blogspot.com/2011/09/cheesy-vegetable-chowder.html
Ingredients that I used:
2 Tablespoons Olive oil
3/4 cup chopped onion
1 cup chopped carrot
3 garlic cloves, chopped
4 cups chicken broth
2 large baking potatoes, chopped
3 tablespoons flour
1 cup water
2/3 milk
splash of heavy cream
4 cups broccoli, chopped
2 cups shredded cheddar cheese
1 1/2 cups of fiesta and taco blend shredded cheese
The course I took:
Saute onions and carrots in a large soup pot. When they are tender, add garlic and cook 1-3 additional minutes. Add chicken broth and potatoes, bring to a boil, and cook until the potatoes are tender. Add some spices that seem appropriate. Mix flour with water, add, and simmer until soup is slightly thickened.
Add more flour mixed with water, and continue to wait for it to slightly thicken. Add milk. Add more flour mixed with water and a splash of heavy cream. Realize the potatoes are supposed to be peeled. The potatoes are falling a part and the potato skins are mixed in the soup. Add broccoli until it is tender.

Stir in cheddar cheese. Add all the shredded cheese you can find in the fridge to make it really cheesy, including fiesta and taco cheese blend. Allow to melt, serve!
Next time improvements:
1. Add lemon pepper with appropriate spices. I remember Grandpa Fred telling me that it made the difference for his cheese and broccoli soup.
2. Peel potatoes before chopping them.
3. Add more cheddar cheese or difference cheese instead of fiesta blend shredded cheese.
4. Add1 1/2-2 tablespoons of flour intentionally instead of 3 tablespoons randomly. Keep splash of heavy cream for thickening and creaminess.
5. Grate carrots instead of chopping them in an awkward fashion.
6. Get Grandpa Fred to write down the recipe for me and follow his recipe.
To make it all better, when Ryan had some, his first reaction was, "This is good!" So I will probably make this again with the improvements!
I LOVE love love love cheese and broccoli soup. My Grandpa Fred always makes it for me when I visit them in Alabama (which will happen in a few weeks! Eeeeeee!).
I thought this dish would be similar to Grandpa Fred's, yet different enough that I wouldn't compare it to his soup exactly. Maybe it was sort of different enough, but when I was struggling with the "slightly thickening" I thought, how does Grandpa DO this...? After tripling the amount of flour in the recipe and adding a splash of heavy cream (which is what thickened the sauce in my basil pasta dish), I got the cheese sauce thicker... somehow. (However I thought the sauce was a little grainy, not a smooth, creamy texture... was that because of the extra flour? or because of the over cooked potatoes?).
The recipe I found on pinterest:
http://luluthebaker.blogspot.com/2011/09/cheesy-vegetable-chowder.html
Ingredients that I used:
2 Tablespoons Olive oil
3/4 cup chopped onion
1 cup chopped carrot
3 garlic cloves, chopped
4 cups chicken broth
2 large baking potatoes, chopped
3 tablespoons flour
1 cup water
2/3 milk
splash of heavy cream
4 cups broccoli, chopped
2 cups shredded cheddar cheese
1 1/2 cups of fiesta and taco blend shredded cheese
The course I took:
 |
| Waiting and waiting for it to thicken. |
Add more flour mixed with water, and continue to wait for it to slightly thicken. Add milk. Add more flour mixed with water and a splash of heavy cream. Realize the potatoes are supposed to be peeled. The potatoes are falling a part and the potato skins are mixed in the soup. Add broccoli until it is tender.
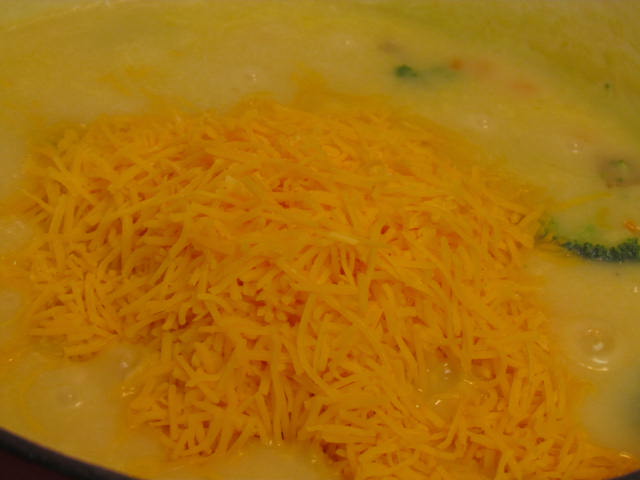
Stir in cheddar cheese. Add all the shredded cheese you can find in the fridge to make it really cheesy, including fiesta and taco cheese blend. Allow to melt, serve!
 |
| Thick and cheesy broccoli soup! |
Next time improvements:
1. Add lemon pepper with appropriate spices. I remember Grandpa Fred telling me that it made the difference for his cheese and broccoli soup.
2. Peel potatoes before chopping them.
3. Add more cheddar cheese or difference cheese instead of fiesta blend shredded cheese.
4. Add1 1/2-2 tablespoons of flour intentionally instead of 3 tablespoons randomly. Keep splash of heavy cream for thickening and creaminess.
5. Grate carrots instead of chopping them in an awkward fashion.
6. Get Grandpa Fred to write down the recipe for me and follow his recipe.
To make it all better, when Ryan had some, his first reaction was, "This is good!" So I will probably make this again with the improvements!
Sunday, December 2, 2012
cooking with my basil
I am not a cook with lots of talent. I can't use recipes "as starters" to have a successful dish. I don't know exactly what "al dente" means. And I certainly can't stand shopping for groceries, especially items that I've never used before for new recipes. If I go up and down each isle only twice... it's a miracle. Sometimes I even call my Mom to ask her where I should look and how it's packaged (it's hard to find something when you think it's going to be in a can, but instead it's in a box). Overall the kitchen, in general, is a struggle for me.
Nevertheless, I have lots of GREAT cooking people around me! My Mom and Dad always try new things, healthy and delicious! My bestest friend, Heather, was a nutrition/foods science major in college, and she's always been a brave kitchen warrior. She always sends me easy recipes that feel like shortcuts. For example, she taught me about marinading chicken. Now I don't hate cooking chicken.
Okay, on with what I cooked with my blossoming basil plant (thanks Dad!). It was delicious.
Basil chicken and Parmesan sauce:
Ingredients:
2 boneless, skinless chicken breasts, cut into small bite size pieces
1 box of rotini pasta
2 garlic cloves, chopped
Lots of basil, maybe 12-15 leaves
1 teaspoon of ground black pepper
1 cup heavy whipping cream
1/4 overflowing cup Parmesan cheese
Marinade for the chicken:
1 cup soy sauce
a splash of worchester sauce
lemon juice from 1/2 lemon
2 tablespoons of honey
2 garlic cloves, smashed
onion powder
garlic powder
cayenne pepper
ground black pepper
Cook the pasta until it's done, drain. While that's cooking, saute chicken and garlic. When the chicken is mostly done, add the heavy cream, Parmesan cheese, black pepper and basil. Bring to a boil and simmer for 4-6 minutes. Toss pasta into sauce and serve! Add fresh basil for garnish.
Improvements for next time:
1. Marinade the chicken for only 1 day. I marinaded the chicken for over 2-3 days (because I didn't have the heavy cream to make the dish), so the chicken was salty and had a lot of the soy sauce taste.
2. Use more chicken. I only defrosted 2 pieces of chicken, but the dish in the end was mostly pasta. The marinade would be enough with double the amount of chicken.
Any other suggestions for next time while I wait for my basil plant to grow back?
Nevertheless, I have lots of GREAT cooking people around me! My Mom and Dad always try new things, healthy and delicious! My bestest friend, Heather, was a nutrition/foods science major in college, and she's always been a brave kitchen warrior. She always sends me easy recipes that feel like shortcuts. For example, she taught me about marinading chicken. Now I don't hate cooking chicken.
Okay, on with what I cooked with my blossoming basil plant (thanks Dad!). It was delicious.
Basil chicken and Parmesan sauce:
 |
| Simmering, before adding the pasta |
Ingredients:
2 boneless, skinless chicken breasts, cut into small bite size pieces
1 box of rotini pasta
2 garlic cloves, chopped
Lots of basil, maybe 12-15 leaves
1 teaspoon of ground black pepper
1 cup heavy whipping cream
1/4 overflowing cup Parmesan cheese
Marinade for the chicken:
1 cup soy sauce
a splash of worchester sauce
lemon juice from 1/2 lemon
2 tablespoons of honey
2 garlic cloves, smashed
onion powder
garlic powder
cayenne pepper
ground black pepper
 |
| Final product without the fresh basil garnish |
Cook the pasta until it's done, drain. While that's cooking, saute chicken and garlic. When the chicken is mostly done, add the heavy cream, Parmesan cheese, black pepper and basil. Bring to a boil and simmer for 4-6 minutes. Toss pasta into sauce and serve! Add fresh basil for garnish.
Improvements for next time:
1. Marinade the chicken for only 1 day. I marinaded the chicken for over 2-3 days (because I didn't have the heavy cream to make the dish), so the chicken was salty and had a lot of the soy sauce taste.
2. Use more chicken. I only defrosted 2 pieces of chicken, but the dish in the end was mostly pasta. The marinade would be enough with double the amount of chicken.
Any other suggestions for next time while I wait for my basil plant to grow back?
Subscribe to:
Posts (Atom)